Tensilica Xtensa Customizable Processors
Preamble
As of FreeRTOS V10.1.1 the Xtensa project is not yet in the main FreeRTOS .zip
file release. It will be included in the next release - until that time the
project is provided as a separate zip file download.
Introduction
This page documents the demo application that targets the
Tensilica Xtensa Customizable Processors.
The project targets the Xtensa Simulator, and builds using
the Xtensa Xplorer IDE
and the XCC compiler.
The project can be compiled to create either a simple blinky demo, or a comprehensive
test and demo application.
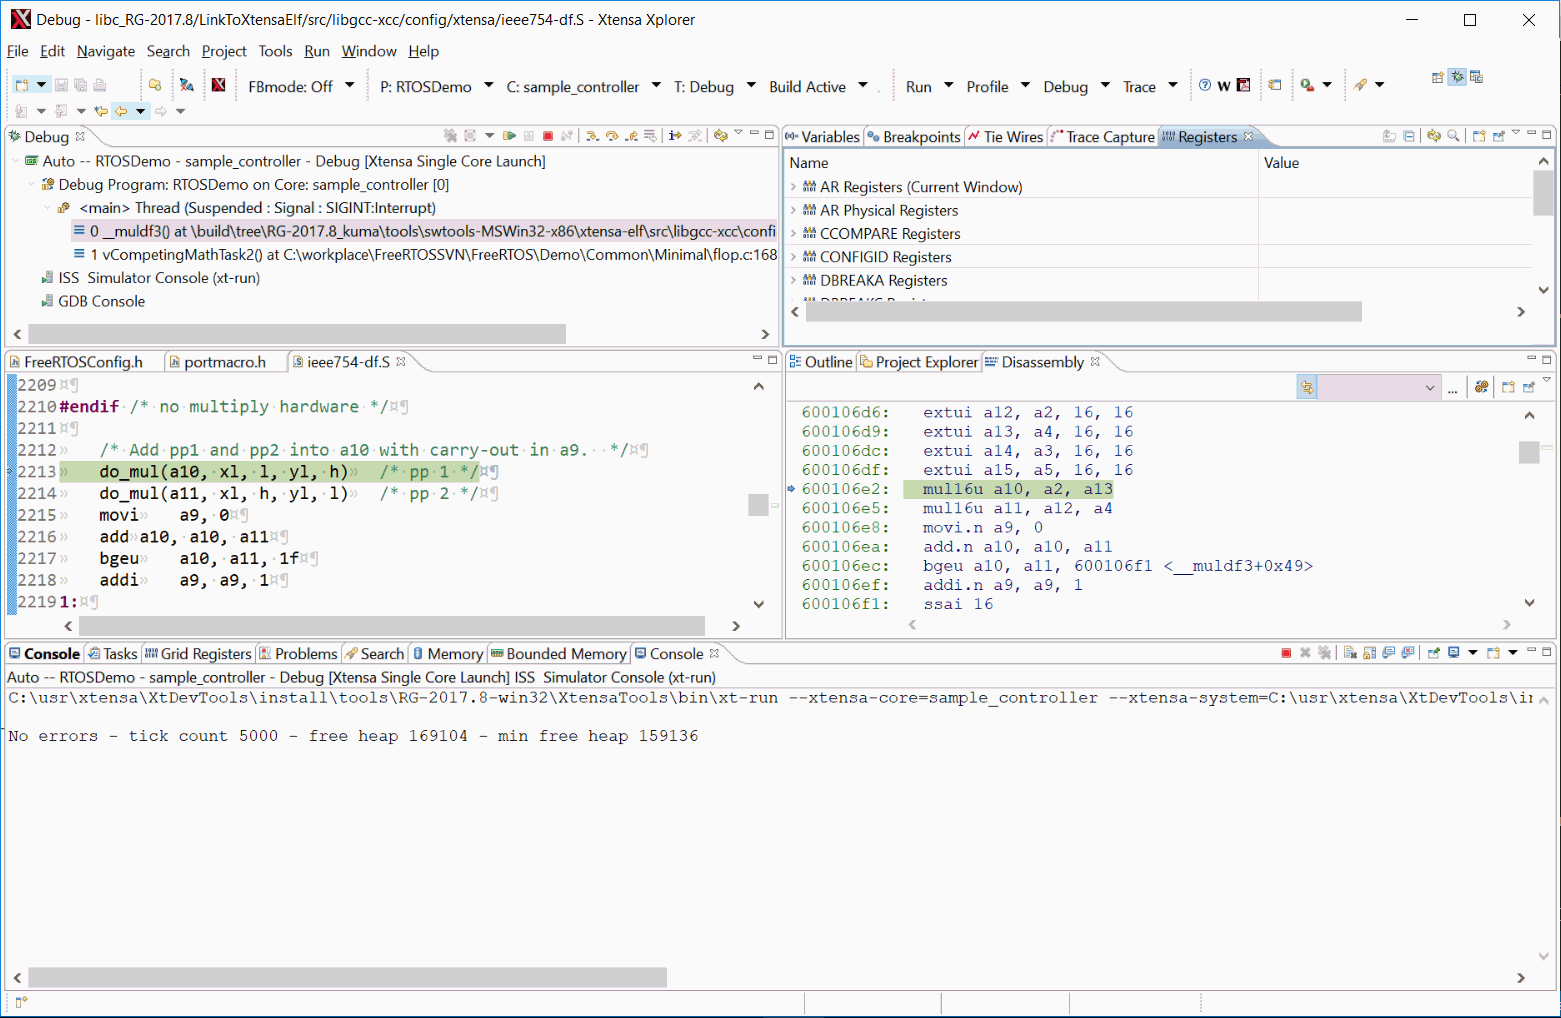 Screen shot of the Xtensa Xplorer IDE
IMPORTANT! Notes on using the Tensilica Xtensa Customizable Processors Demo
Please read all the following points before using this RTOS port.
- Source Code Organisation
- The Demo Application
- RTOS Configuration and Usage Details
See also the FAQ My application does
not run, what could be wrong?, noting in particular the recommendation to
develop with configASSERT() defined
in FreeRTOSConfig.h.
Source Code Organisation
The FreeRTOS download contains the source code for every FreeRTOS port and
all the demo applications. It therefore contains a lot more files than are
required by the Tensilica demos. See the Source Code Organization
section of this website for a description of the downloaded files.
The Xtensa Xplorer project is located in the
/FreeRTOS/Demo/Tensilica_Simulator_Xplorer_XCC directory and has the usual
Eclipse project name .project.
Building and Running the Tensilica Xtensa Customizable Processors RTOS Application
The RTOS demo project can be configured to build either a simple blinky demo, or
a comprehensive test and demo application. The constant mainCREATE_SIMPLE_BLINKY_DEMO_ONLY,
which is defined at the top of main.c file, is used to switch between the two.
-
The simple blinky demo is created if mainCREATE_SIMPLE_BLINKY_DEMO_ONLY
is set to 1.
-
The comprehensive demo is created if mainCREATE_SIMPLE_BLINKY_DEMO_ONLY
is set to 0.
Functionality with mainCREATE_SIMPLE_BLINKY_DEMO_ONLY set to 1
If mainCREATE_SIMPLE_BLINKY_DEMO_ONLY is set to 1 then main()
calls main_blinky(). main_blinky() creates a very simple demo as follows:
-
The main_blinky() Function:
main_blinky() creates one queue, one software timer, and two tasks. It
then starts the RTOS scheduler.
-
The Queue Send Task:
The queue send task is implemented by the prvQueueSendTask() function in
main_blinky.c file. It uses vTaskDelayUntil() to send the value 100 to
the queue every 200 milliseconds.
-
The Queue Send Software Timer:
The timer is an auto-reload timer with a period of two seconds. The timer's
callback function writes the value 200 to the queue. The callback function
is implemented by prvQueueSendTimerCallback() within main_blinky.c file.
-
The Queue Receive Task:
The queue receive task is implemented by prvQueueReceiveTask() in
main_blinky.c file. It waits for data to arrive on the queue. When data
is received, the task checks the value of the data, then outputs a message
to indicate if the data came from the queue send task or the queue send
software timer.
Note this is the only task that outputs a message, so no attempt is made
to make the printf function thread safe. Be careful to not use the printf
function in more than one tasks.
The expected behavior is as follows:
-
The queue send task writes to the queue every 200ms, so every 200ms the
queue receive task will output a message indicating that data was received
on the queue from the queue send task.
-
The queue send software timer has a period of two seconds, so every two
seconds the queue receive task will output a message indicating that data
was received on the queue from the queue send software timer.
Functionality with mainCREATE_SIMPLE_BLINKY_DEMO_ONLY set to 0
If mainCREATE_SIMPLE_BLINKY_DEMO_ONLY is set to 0 then main()
calls main_full(). main_full() creates a comprehensive test and demo application
that demonstrates, among other things:
The created tasks are from the set of standard demo
tasks. Standard demo tasks are used by all FreeRTOS port demo applications and
have no specific functionality. They are used to demonstrate how to use the
FreeRTOS API, and to test the RTOS port.
A 'check' task is created to periodically inspect the standard demo tasks in
order to ensure all the tasks are functioning as expected. If no error is detected,
the check task periodically outputs "No errors", the current simulated tick time,
free heap size and the minimum free heap size so far. If an error is discovered
in the execution of a task then the check task will output an appropriate
error message.
Note this is the only task that outputs a message, so no attempt is made
to make the printf function thread safe. Be careful to not use the printf
function in more than one tasks.
Interrupt queue tests (file IntQueue.c) exercise interrupt nesting and are observed
to interfere with the proper functioning of other tests on the Simulator. Therefore,
the mainENABLE_INT_QUEUE_TESTS macro is provided in the file main_full.c to choose
whether to enable interrupt queue tests or all other tests.
-
When mainENABLE_INT_QUEUE_TESTS is set to 1, interrupt queue tests are
enabled and every other test is disabled.
-
When mainENABLE_INT_QUEUE_TESTS is set to 0, interrupt queue tests are
disabled and every other test is enabled.
-
Start the Xtensa Xplorer IDE, and either create a new or select an existing
workspace when prompted.
-
Select "Import" from the IDE's "File" menu. The dialogue box shown below
will appear. Select "General-->Existing Projects into Workspace", as
shown below:
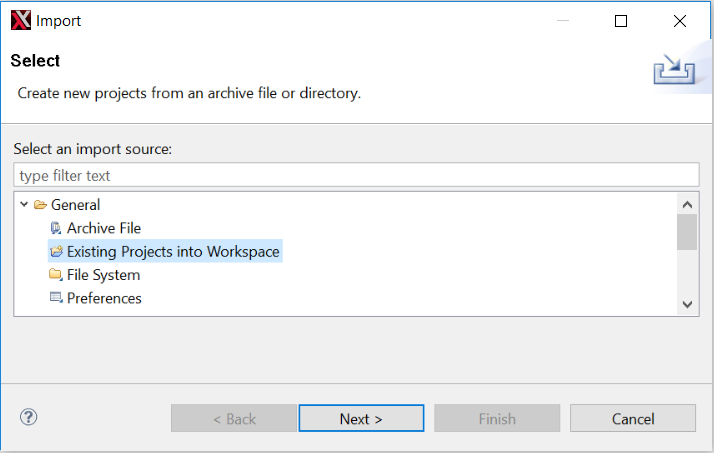 The dialogue box that appears when "Import" is first clicked
-
In the next dialogue box, select /FreeRTOS/Demo/Tensilica_Simulator_Xplorer_XCC
as the root directory. Make sure the RTOSDemo project is checked in the "Projects" area,
and that the Copy Projects Into
Workspace box is not checked, before clicking
the Finish button (see the image below for the correct check box states).
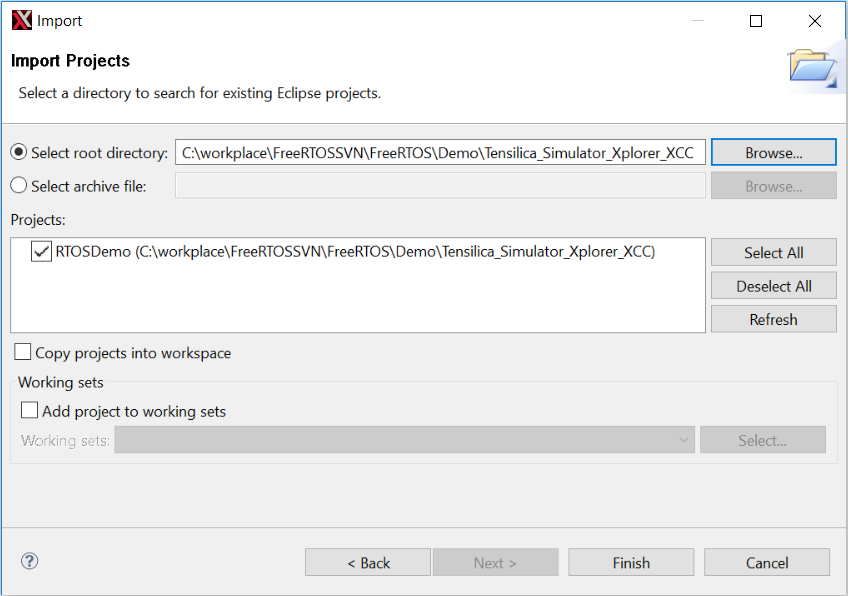 Make sure RTOSDemo is checked, and "Copy projects into workspace" is not checked
-
Select "RTOSDemo" from the Active Project dropdown, as shown below (click to enlarge):
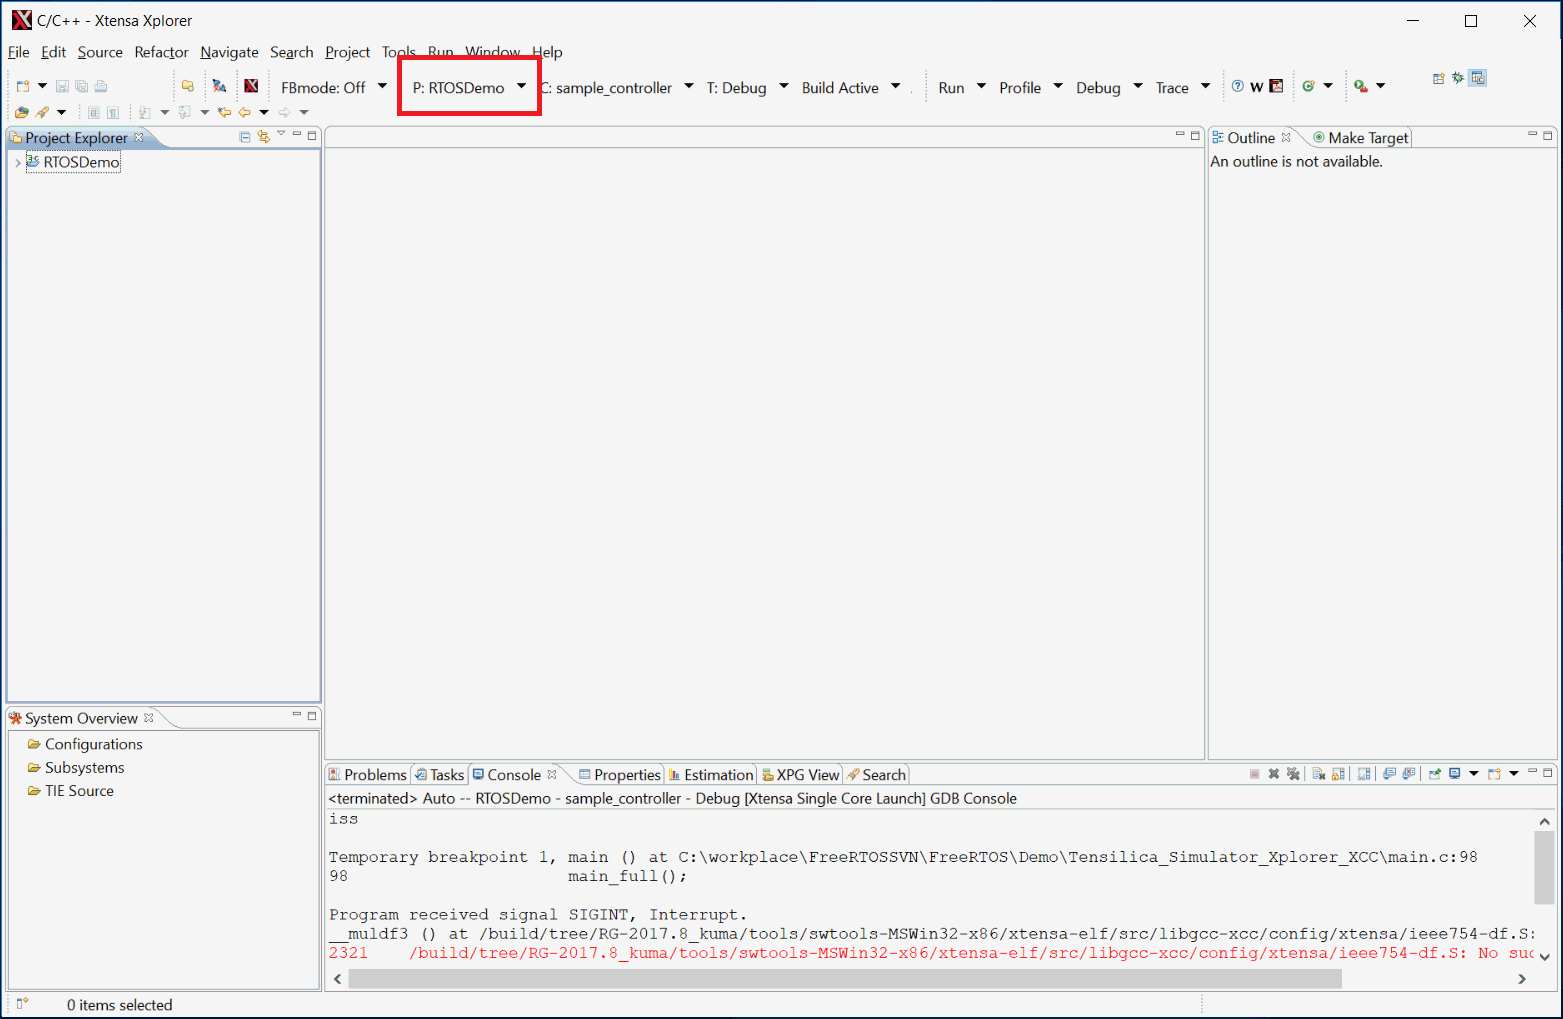 Select Active Project
-
Select "Build Active" from the Build dropdown (or press Ctrl+Alt+B), as
shown below (click to enlarge):
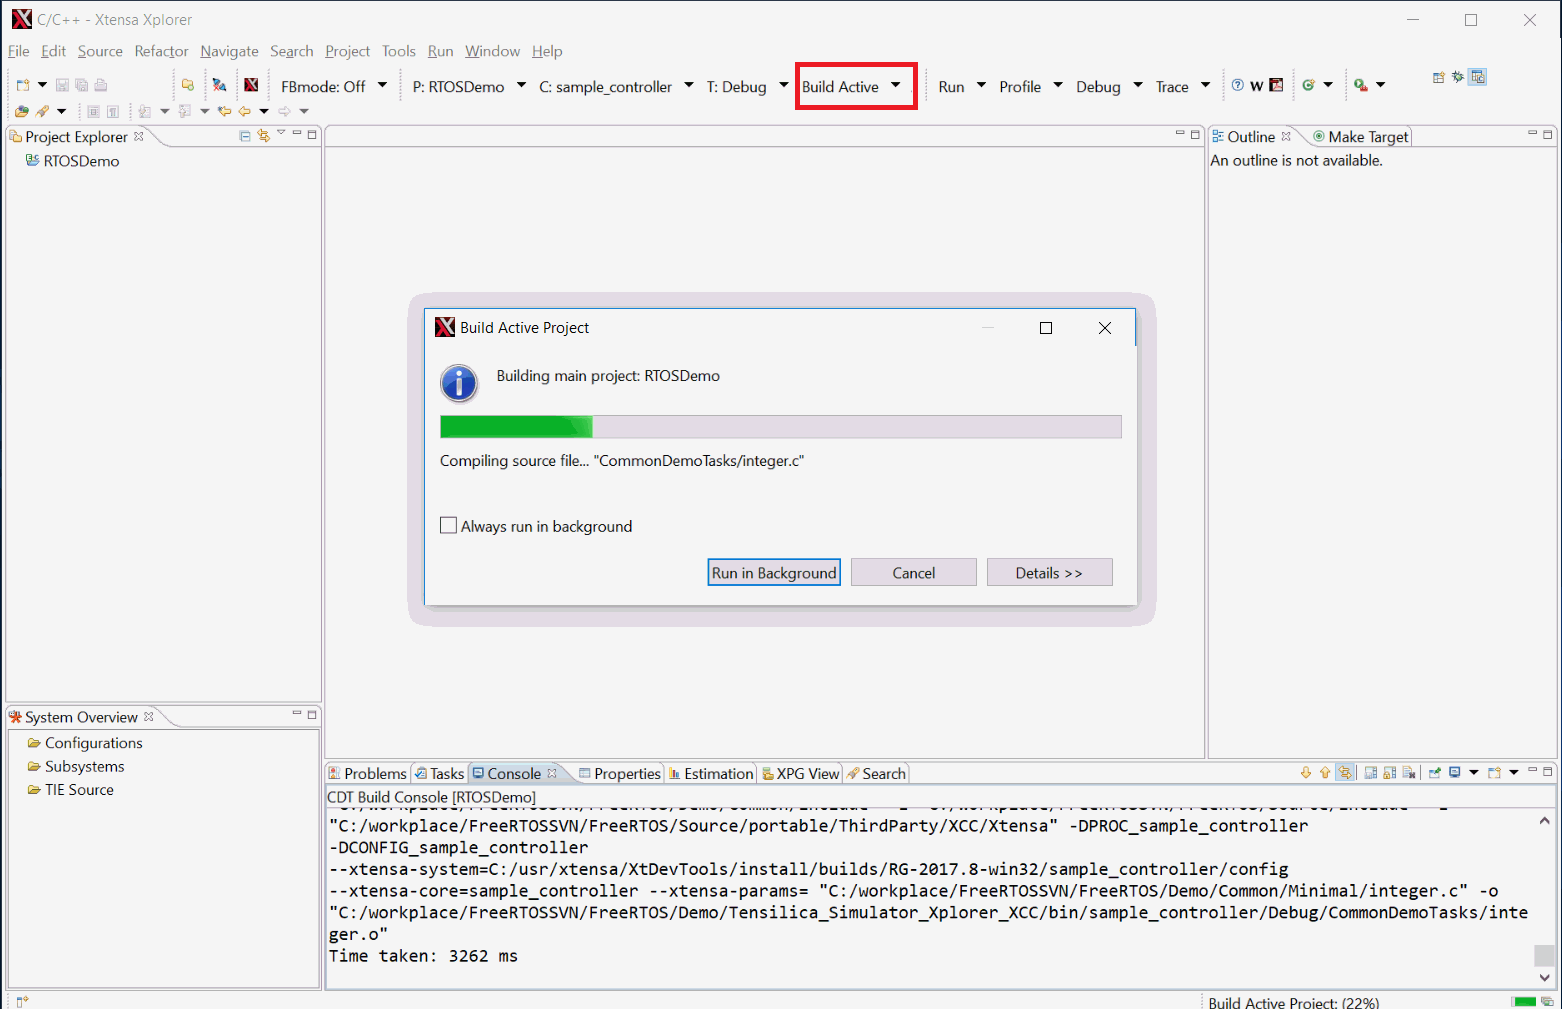 Build Active Project
-
Select "Debug" from the Debug dropdown to start a debug session, as shown
below (click to enlarge):
 Debug Active Project
-
Select "Simulator Console" from the Console dropdown to see the output
from the demo, as shown below (click to enlarge):
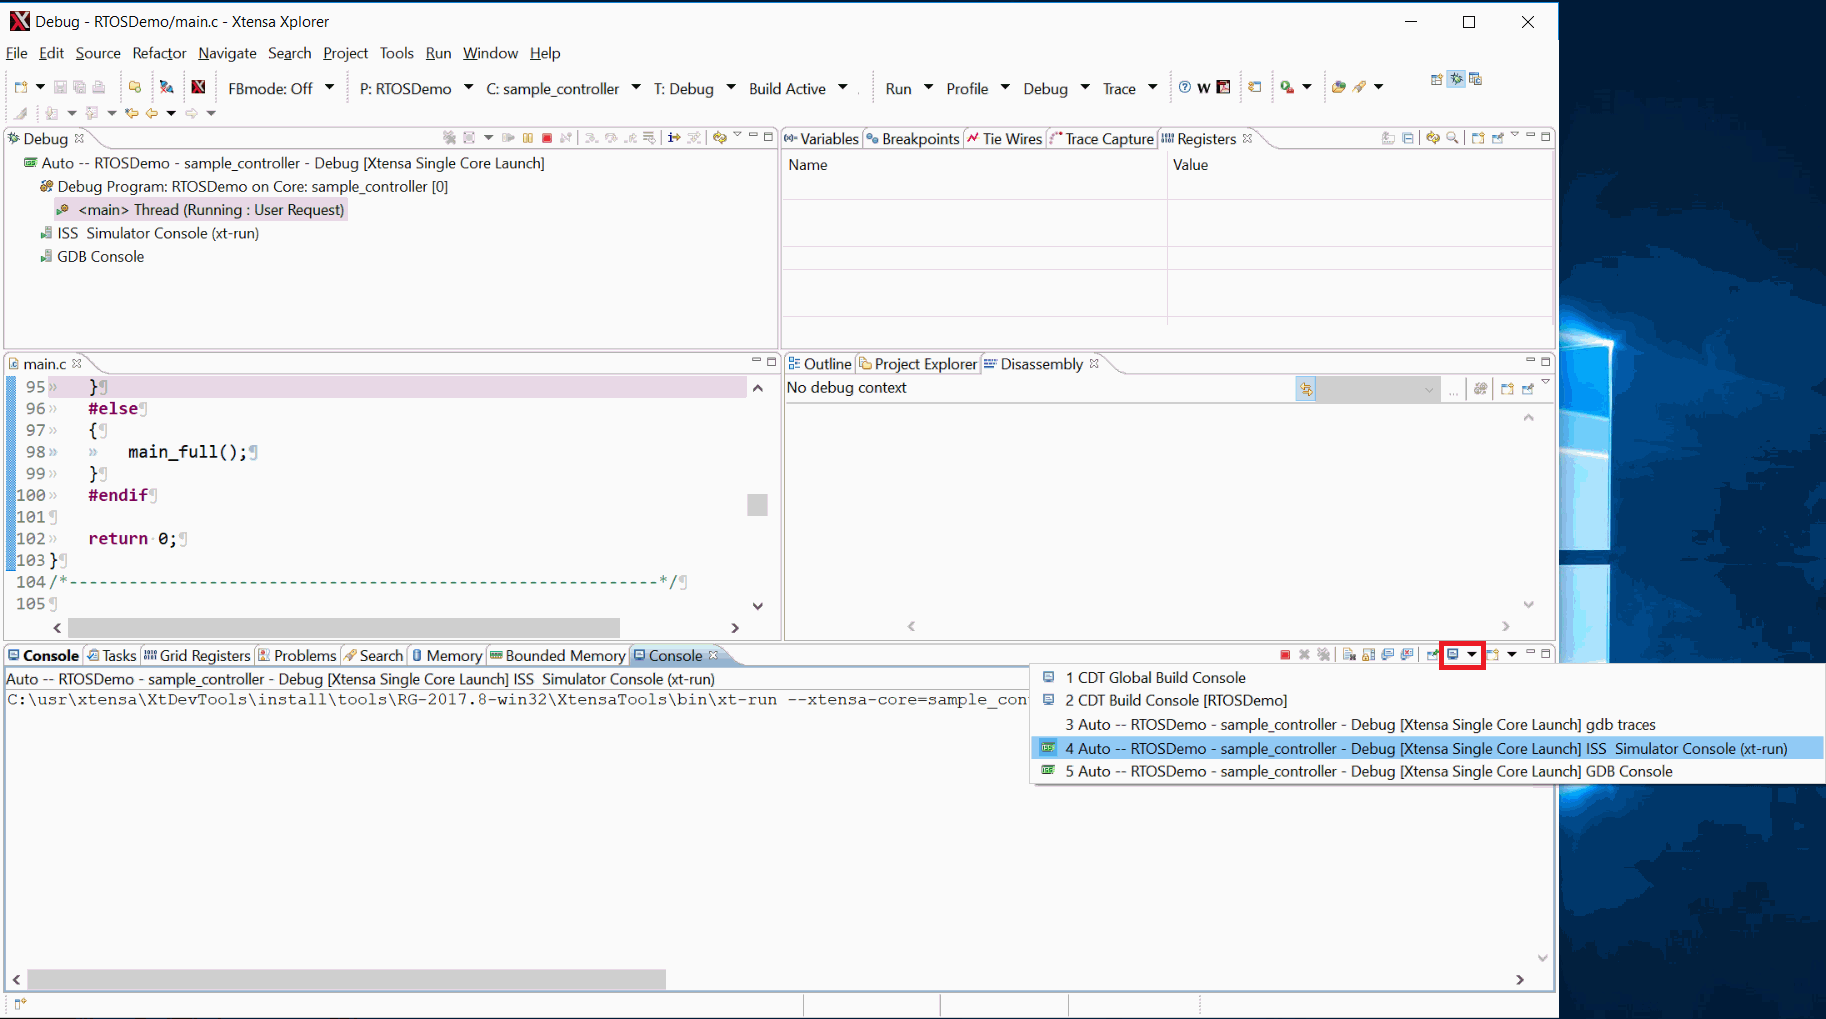 Simulator Console
Interrupt service routines
Interrupt service routines that cause a context switch have no special requirements
and can be written as per the compiler documentation. An example is provided below
which shows the use of the macro portYIELD_FROM_ISR to request a context switch
from within an interrupt service routine. See the file FreeRTOS/Demo/Tensilica_Simulator_Xplorer_XCC/IntQueueTimer.c
for a full example.
void Dummy_IRQHandler( void *arg )
{
long lHigherPriorityTaskWoken = pdFALSE;

    ( void ) arg; /* Parameter not used. */

    /* Clear the interrupt if necessary. */
    Dummy_ClearITPendingBit();

    /* This interrupt does nothing more than demonstrate how to synchronise a
    task with an interrupt.  A task notification is used for this purpose.  Note
    lHigherPriorityTaskWoken is initialised to zero. Only FreeRTOS API functions
    that end in "FromISR" can be called from an ISR! */
    vTaskNotifyGiveFromISR( xTaskToNotify, &lHigherPriorityTaskWoken );

    /* If the task with handle xTaskToNotify was blocked waiting for a notification,
    and giving the notification caused the task to unblock, and the unblocked
    task has a priority higher than the current Running state task (the task that
    this interrupt interrupted), then lHigherPriorityTaskWoken will have been set
    to pdTRUE internally within vTaskNotifyGiveFromISR().  Passing pdTRUE into
    the portYIELD_FROM_ISR() macro will result in a context switch being pended
    to ensure this interrupt returns directly to the unblocked, higher priority,
    task.  Passing pdFALSE into portYIELD_FROM_ISR() has no effect. */
    portYIELD_FROM_ISR( lHigherPriorityTaskWoken );
}
RTOS port specific configuration
Configuration items specific to these demos are contained
in the FreeRTOSConfig.h file located in the same directory as the project file.
The constants defined in FreeRTOSConfig.h can be edited to meet the needs of your
application. In particular -
Each port #defines 'BaseType_t' to equal the most efficient data type for that
processor. This port defines BaseType_t to be of type int.
Switching between the pre-emptive and co-operative RTOS kernels
Set the definition configUSE_PREEMPTION within FreeRTOSConfig.h to 1
to use pre-emption or 0 to use co-operative. The full demo application may not
execute correctly when the co-operative RTOS scheduler is selected.
Compiler options
As with all the ports, it is essential that the correct compiler options
are used. The best way to ensure this is to base your application on the
provided demo application files.
Memory allocation
Source/Portable/MemMang/heap_4.c is included in the demo application
project to provide the memory allocation required by the RTOS kernel. Please
refer to the Memory Management section of the API
documentation for full information.
Miscellaneous
Note that vPortEndScheduler() has not been implemented.
Copyright (C) Amazon Web Services, Inc. or its affiliates. All rights reserved.
|